Byggfakta SMART – Form and Fields in Microsoft Dynamics 365
Last updated on: 18-10-2023
To make changes to forms and fields, you need to be logged in to Make.powerapps.com.
When you are inside Dynamics, we recommend the following approach for adjustments to forms and fields.
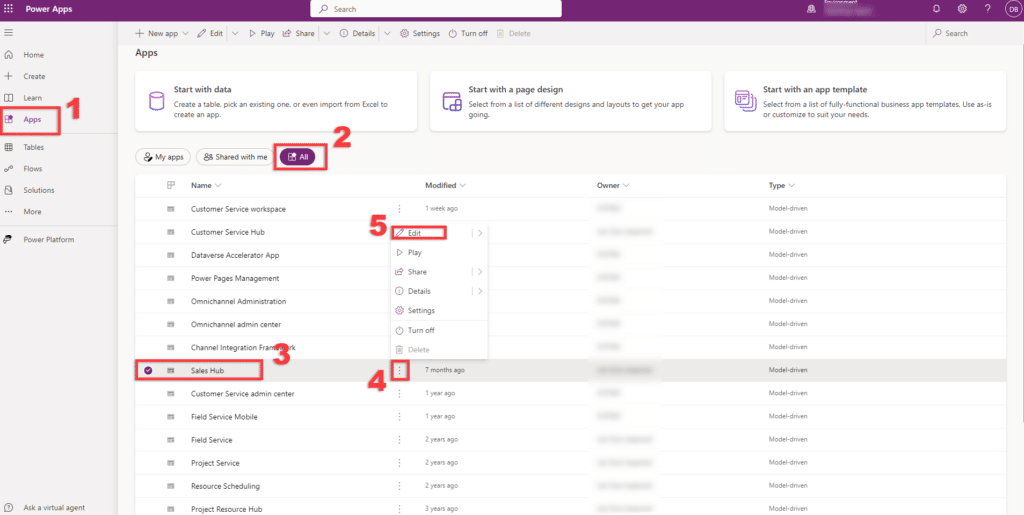
Edit Your App
- Click on “Apps”.
- Click on “All”.
- Find the app you’re using; in this example, we’re using Sales Hub.
- Click on the ellipsis for Sales Hub.
- Click on “Edit”.
Add Settings Panel
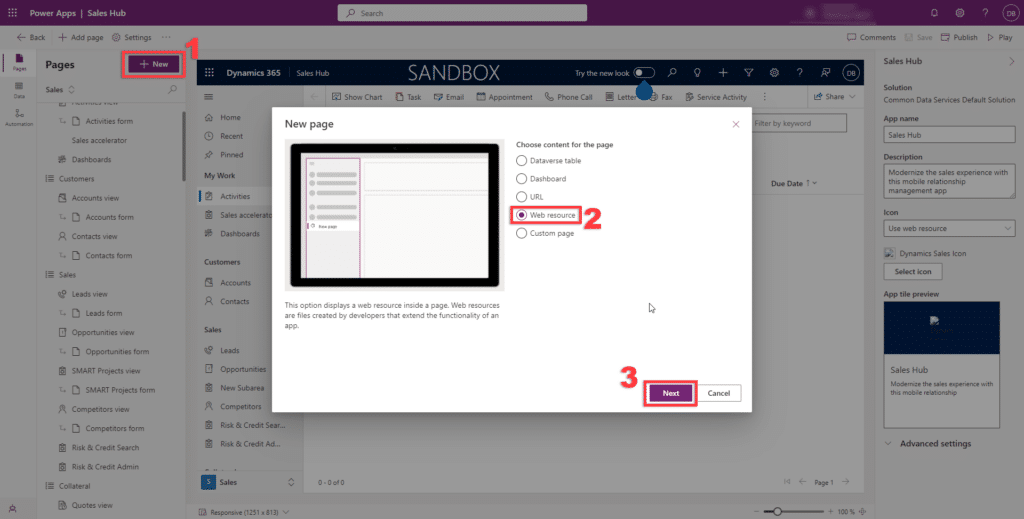
After clicking “Edit” you’ll arrive at the following page, where you should:
- Click “New”.
- Click on “Web Resource”.
- Click “Next”.
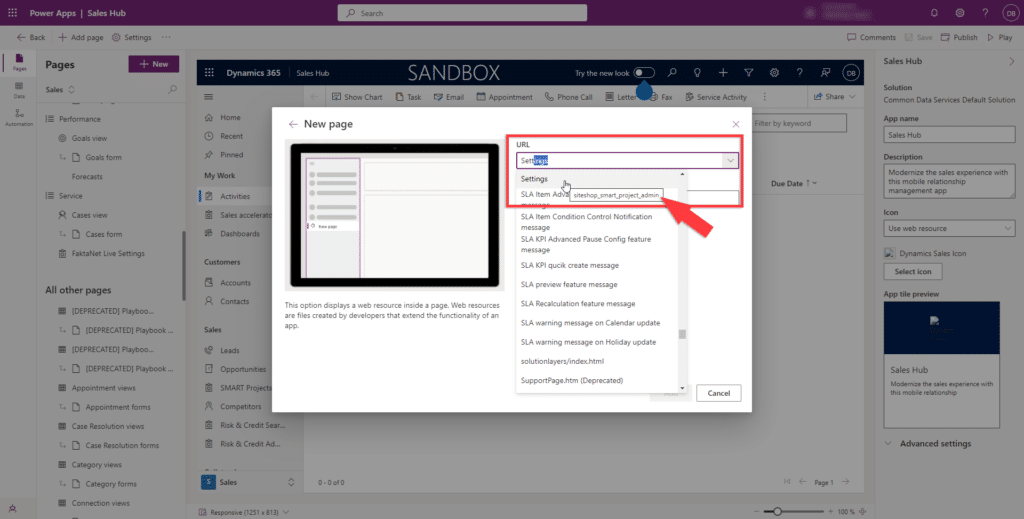
After clicking “Next” you’ll reach the following page, where you should:
- Find and click on “Settings” in the URL. Make sure it is from “siteshop_smart_project_admin,” which you can verify by hovering your mouse over “Settings” and waiting for the description to appear.
- Next, you should name this tab. We recommend calling it “Byggfakta SMART Settings” You can name it just below the URL field, where our dropdown list in the picture might overshadow this field.
- Finish by clicking “Add”.
- Optional step: Limit this page to only be available to certain users, if needed.
Add project table to navigation
- Click “Add a new page”.
- Select “Dataverse table”.
- Click “Next”.
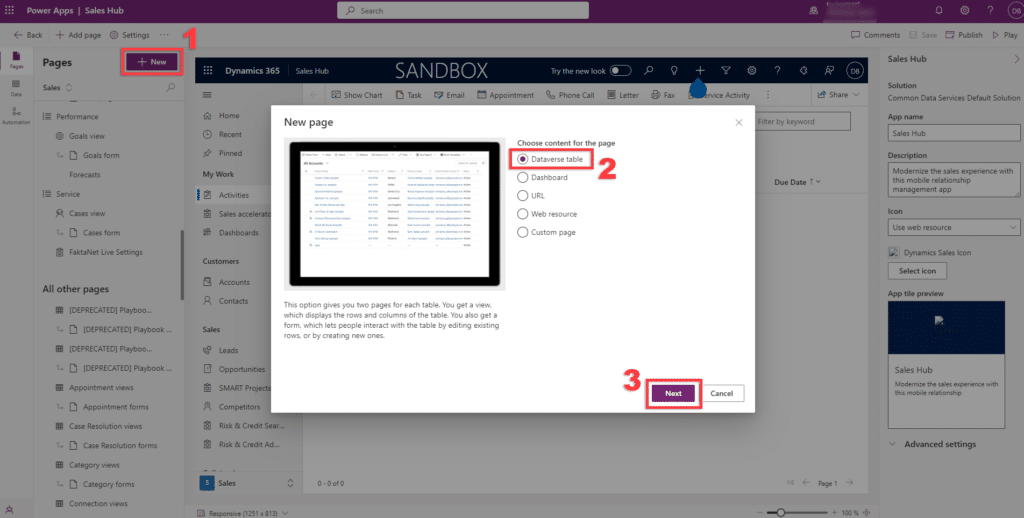
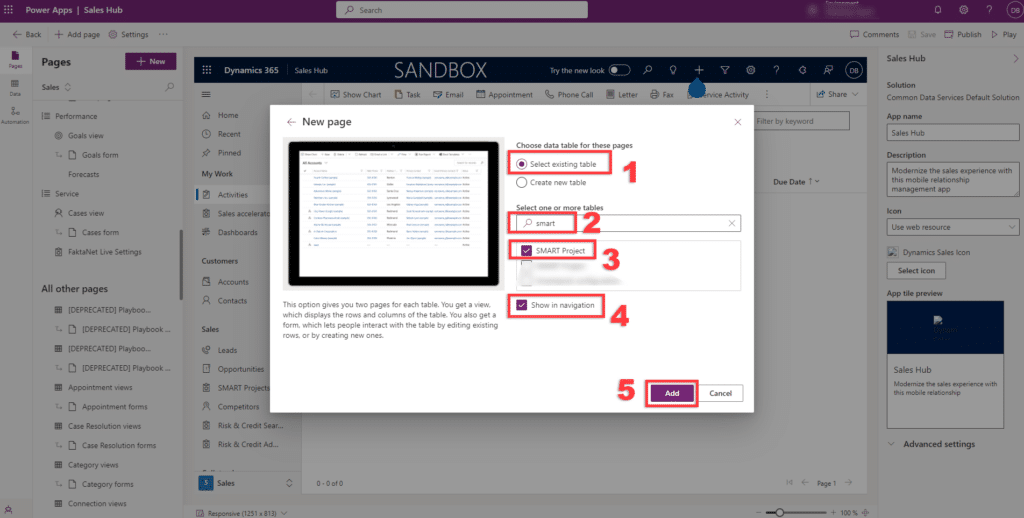
Afterward, you’ll reach this window where you should:
- Select an existing table.
- Search for “Smart”.
- Check the box next to “SMART Project”.
- Check the box next to “Show in navigation”.
- Click “Add”.
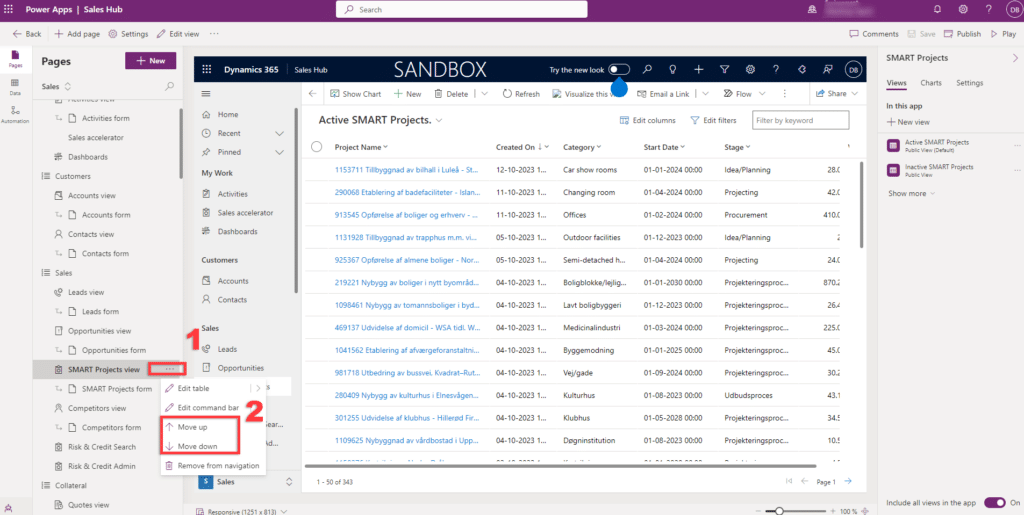
Now that you’ve created the SMART Project tab, you can choose its placement within the CRM system by moving it up or down.
- Click on the ellipsis.
- Choose where the menu should appear by using “Move up” or “Move down”.
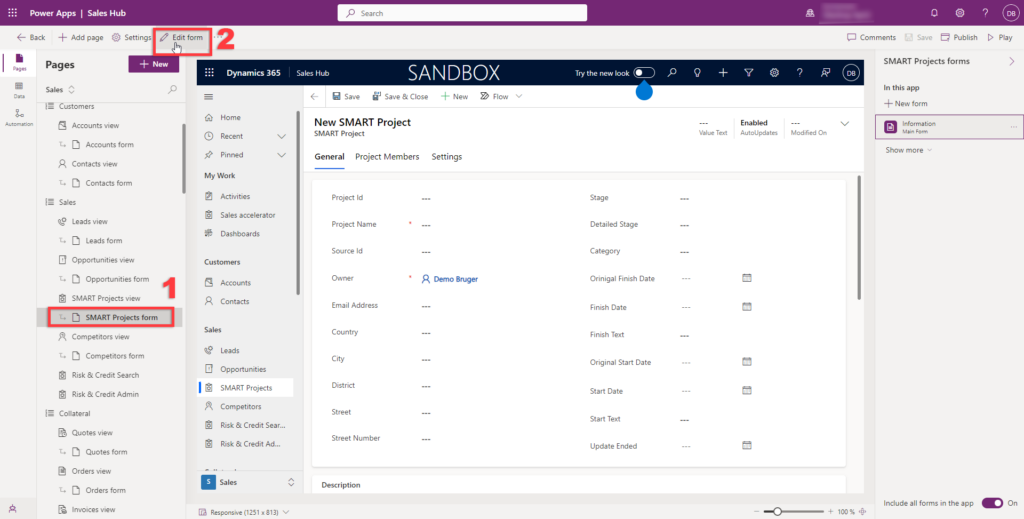
Customize the form
- Click on “SMART projects form”.
- Click on “Edit Form”.
You will now arrive at the following window, where you should do the following:
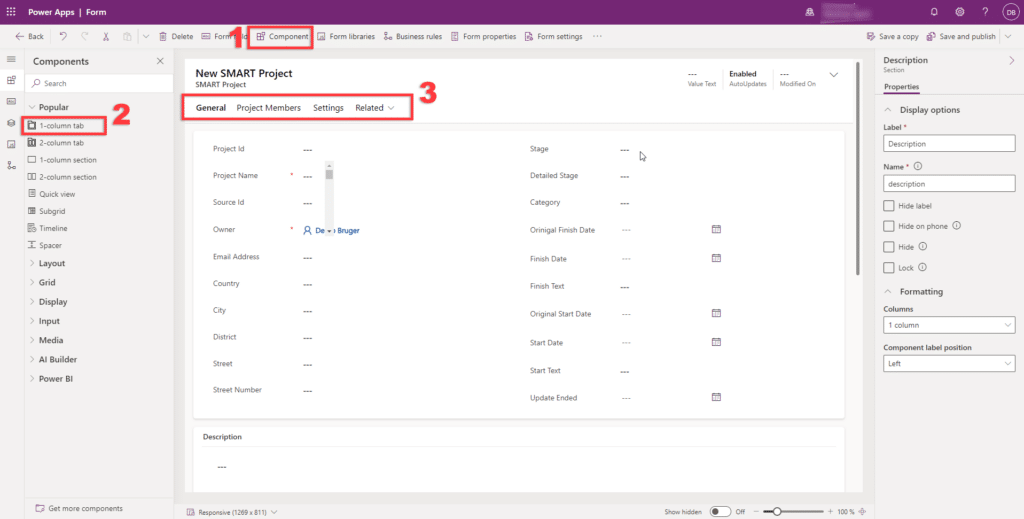
- Click on “Component”.
- Click on or drag and drop “1-column tab” into the menu in step 3.
- It will now appear in the menu highlighted in step 3, and you can adjust its placement by dragging and dropping.
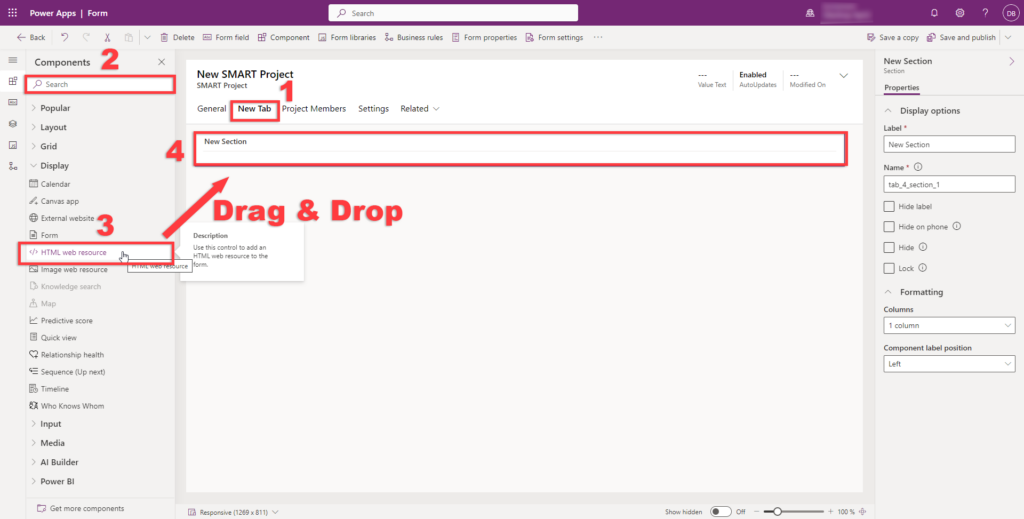
A new tab has been created, in this case named “New Tab” Now, follow these steps:
- Click on “New Tab”.
- Search for “HTML web resource”.
- & 4. Click on or drag and drop it into the “New Section”.
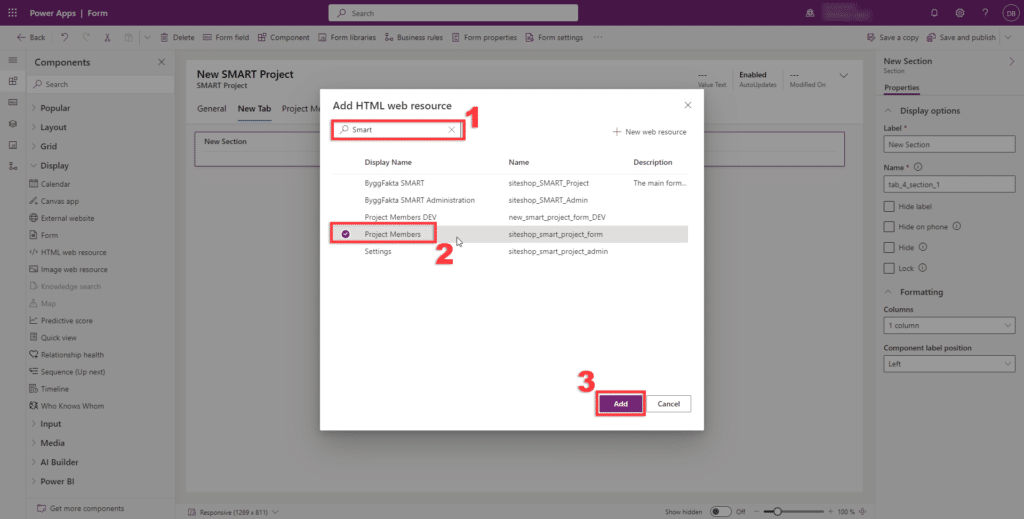
Now, the following window will appear, where you should:
- Search for “Smart”.
- Check “Project Members”.
- Click “Add”.
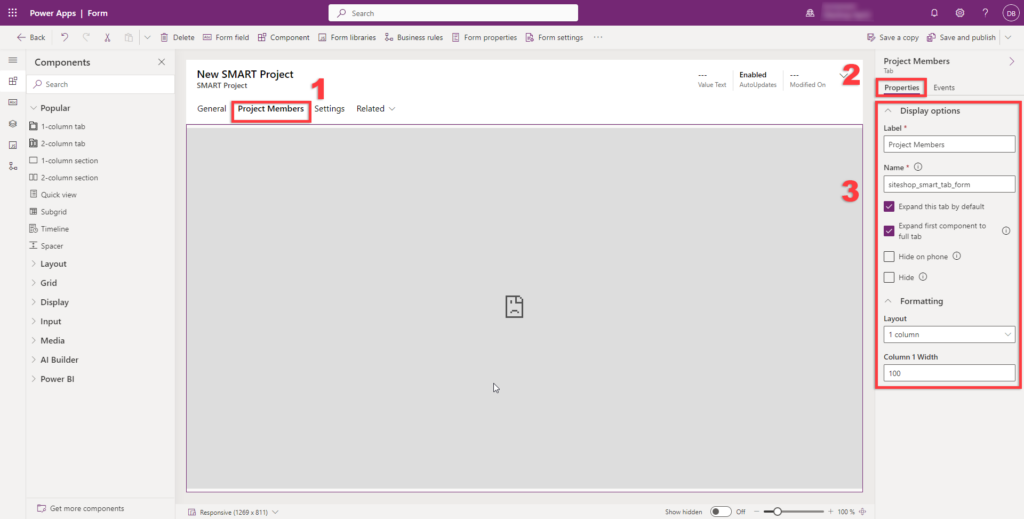
After the new HTML web resource has been created, follow these steps:
- Click on “Project Members”.
- Click on “Properties”.
- Compare the “Display options” to ensure they are the same.
Insert form fields
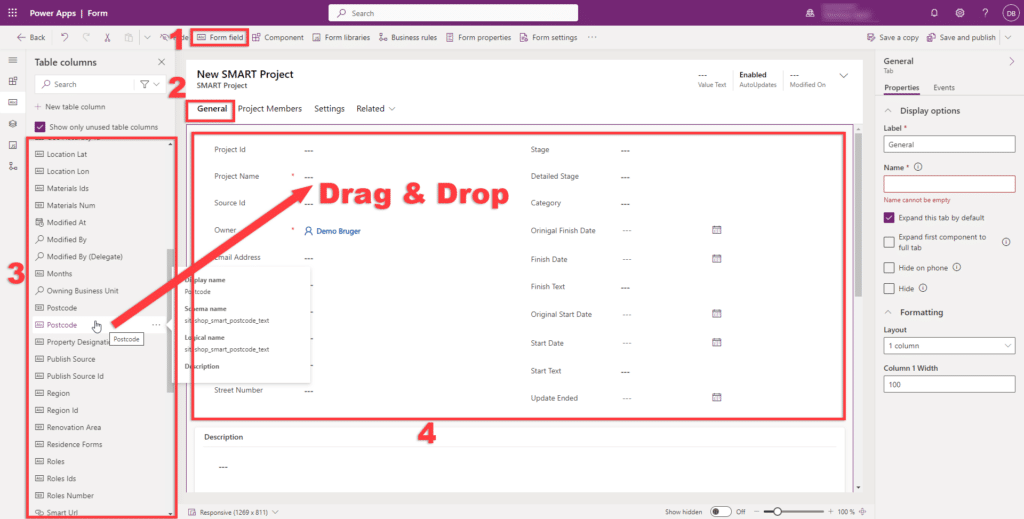
Important: You must have the “siteshop_smart_project_id” field placed.
- Click on “Form field”.
- Click on “General”.
- Click on or drag and drop an element from the list that should be displayed in the Byggfakta SMART integration, and position it by dragging and dropping.
