
Installation of Siteshop Apps for Microsoft Dynamics 365
Last updated on 30-04-2026
To connect to your Dynamics, you must send the following information to Siteshop:
- Application (client) ID
- Application Secret Value
- CRM Domain (URL to your CRM, e.g. https://siteshopaps.crm4.dynamics.com/)
Creating an Azure App
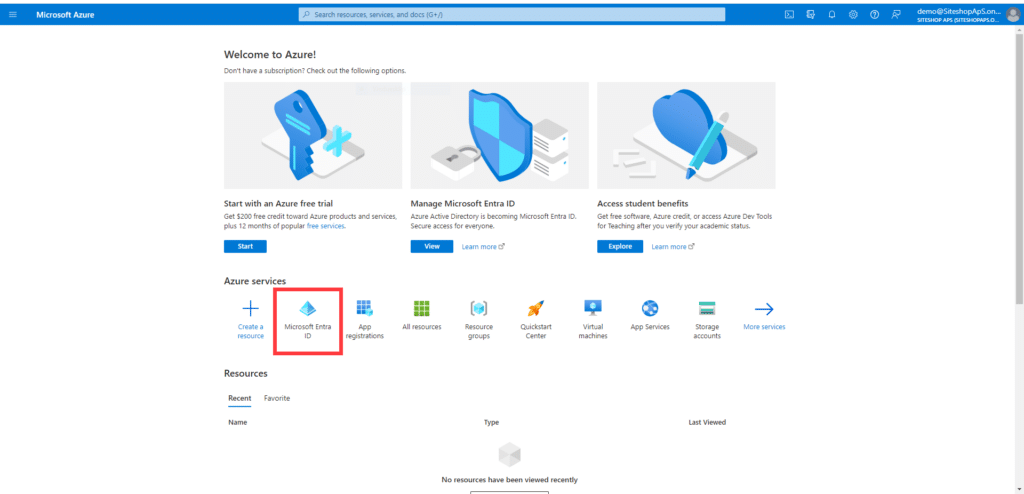
To grant the app access to your Dynamics API, an app needs to be created in the Azure Active directory. Go to https://portal.azure.com -> “Microsoft Entra ID”.
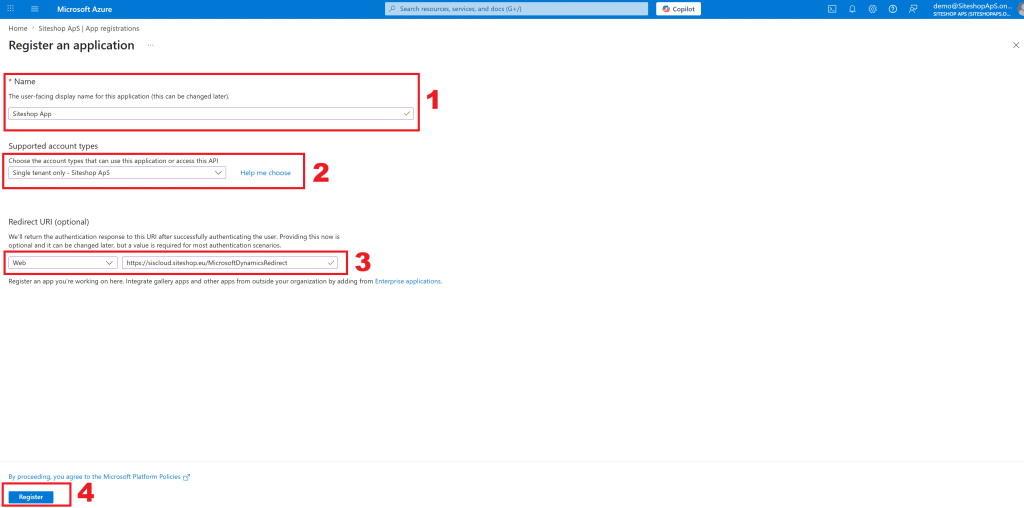
From here, navigate to “App registration” and click “New registration”.

- Enter a fitting name. (This could be specific to the app you are installing, so that you can keep track of what an app is used for. But this app registration can actually be used by all Siteshop apps made for Dynamics. This name can be changed later.
- Make sure to pick the Supported account type (“Accounts in this organizational directory only ([Organization name] – Single tenant”).
- Enter this redirect URL with the “Web” option: https://siscloud.siteshop.eu/MicrosoftDynamicsRedirect
- Register the app.
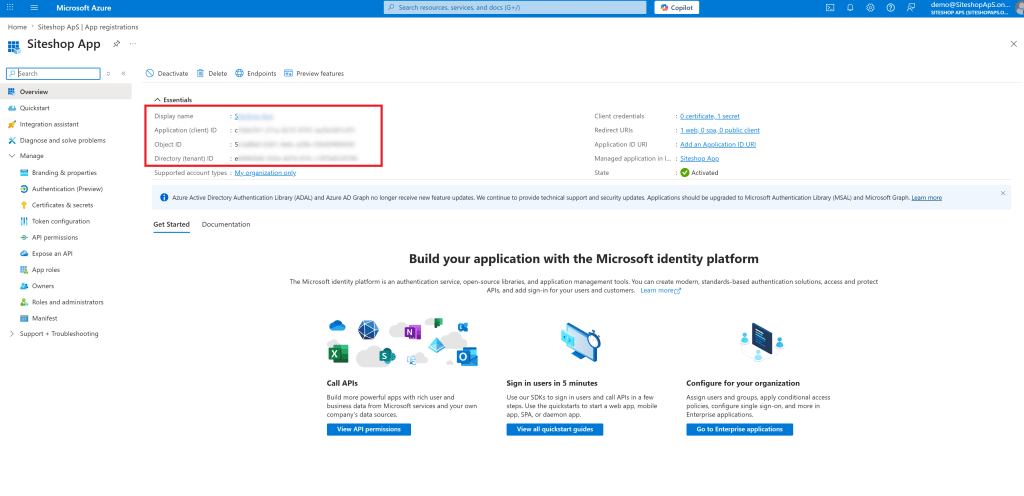
You are now presented with a window containing most of the data Siteshop needs to install your integration. Save the essential values provided (Application (client) ID, Directory (tenant) ID, Object ID).
Creating a secret
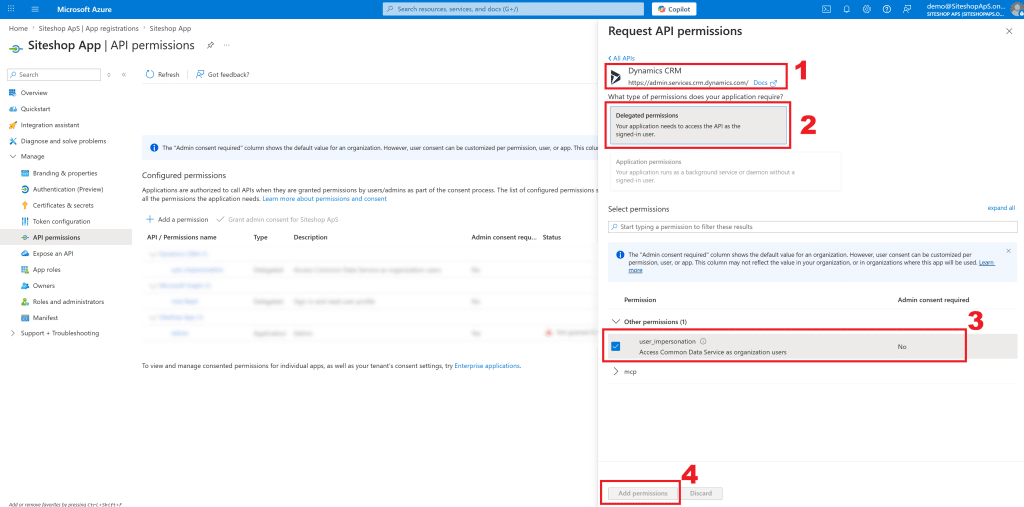
Navigate to “API permissions” and click “Add permission”.
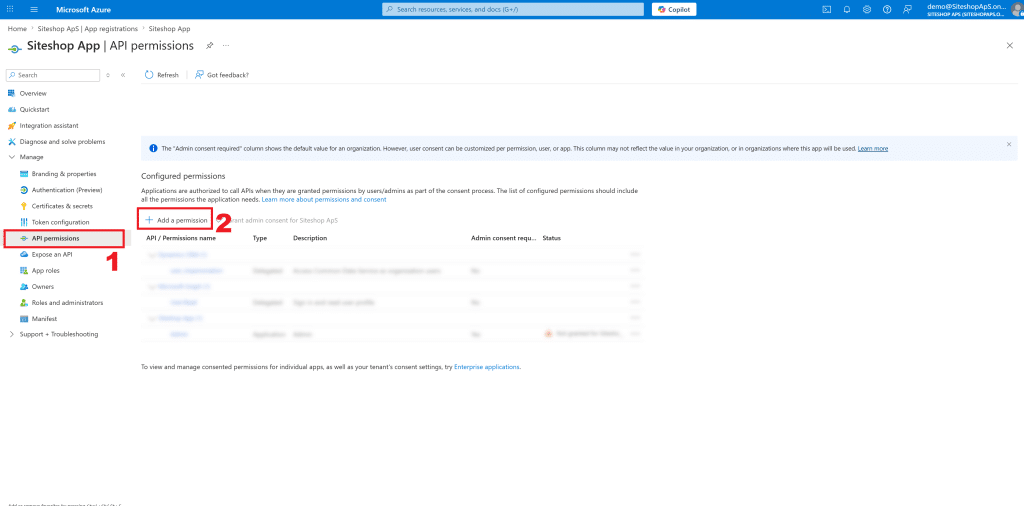
Choose the “Dynamics CRM” option, within that choose “Delegate permissions”, and make sure to check the “user_impersonation” checkbox such that it is selected.
Now navigate to “Certificates & secrets” and click “New client secret”.
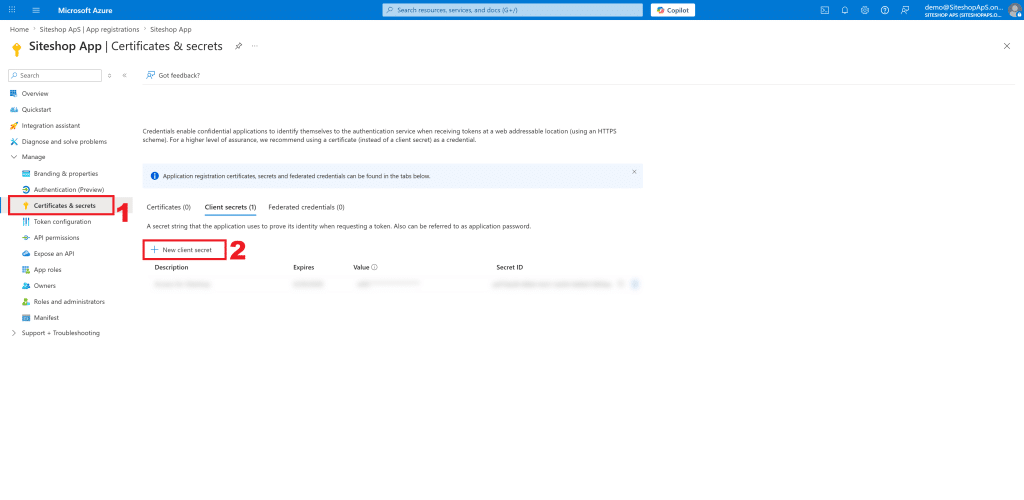
Give the secret a fitting name and decide for how long it should be active (We recommend “never”, such that your integration will run seamless for as long as you need it).
IMPORTANT: The time of creation is the only time the full secret will be available to you. Make sure to save it, or supply it to Siteshop immediately to avoid having to redo steps.
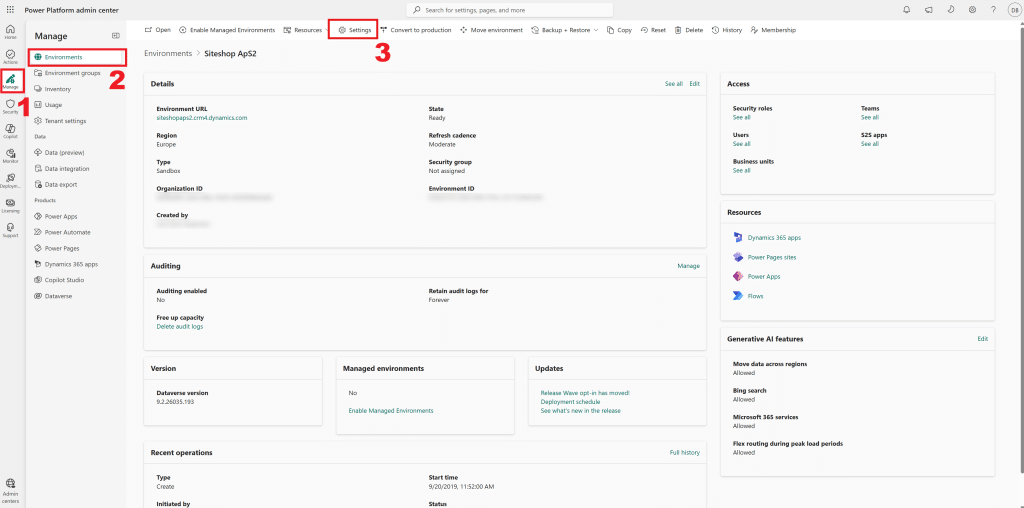
Application user
Once we have an application defined, we need to create a special non-interactive user in MS Dynamics and connect it to that application. Such users are called ‘application users’ and managed using ‘Power Platform admin center’:
https://admin.powerplatform.microsoft.com/
We need to go to the ‘Application users’ section:
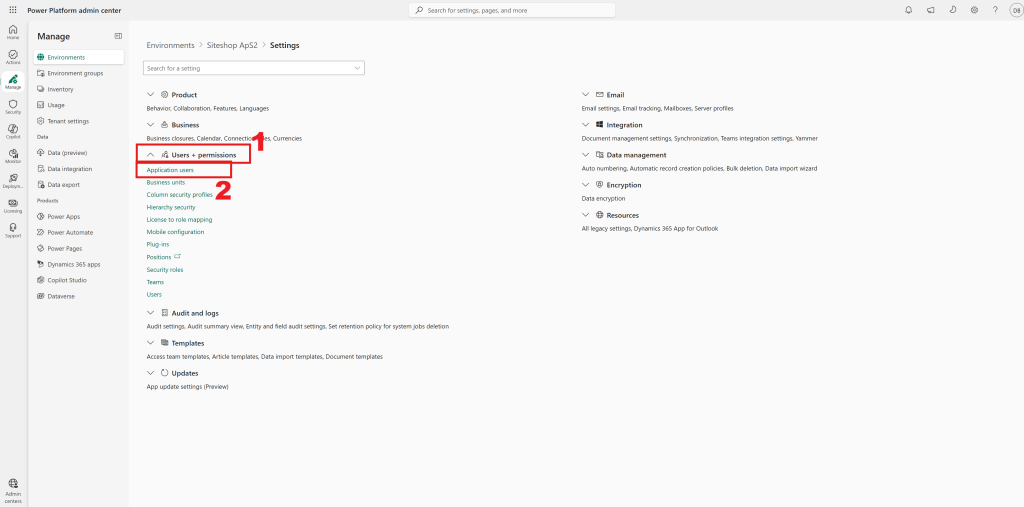
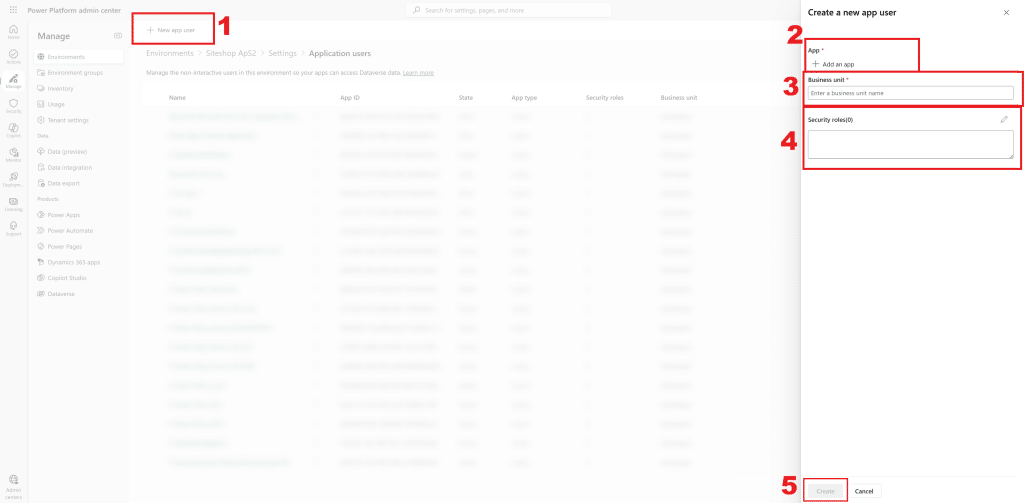
…and create a new application user:
When creating a new application user we need to select an application (created previously) to connect the user to, a business unit and assign security roles:
Now we have an application user that can be used to connect to MS Dynamics.