APSIS One Connector, for SuperOffice
Last updated on 13/11/2023
Please note, you must be a SuperOffice administrator to install and configure this app.
Step 1 – Installation
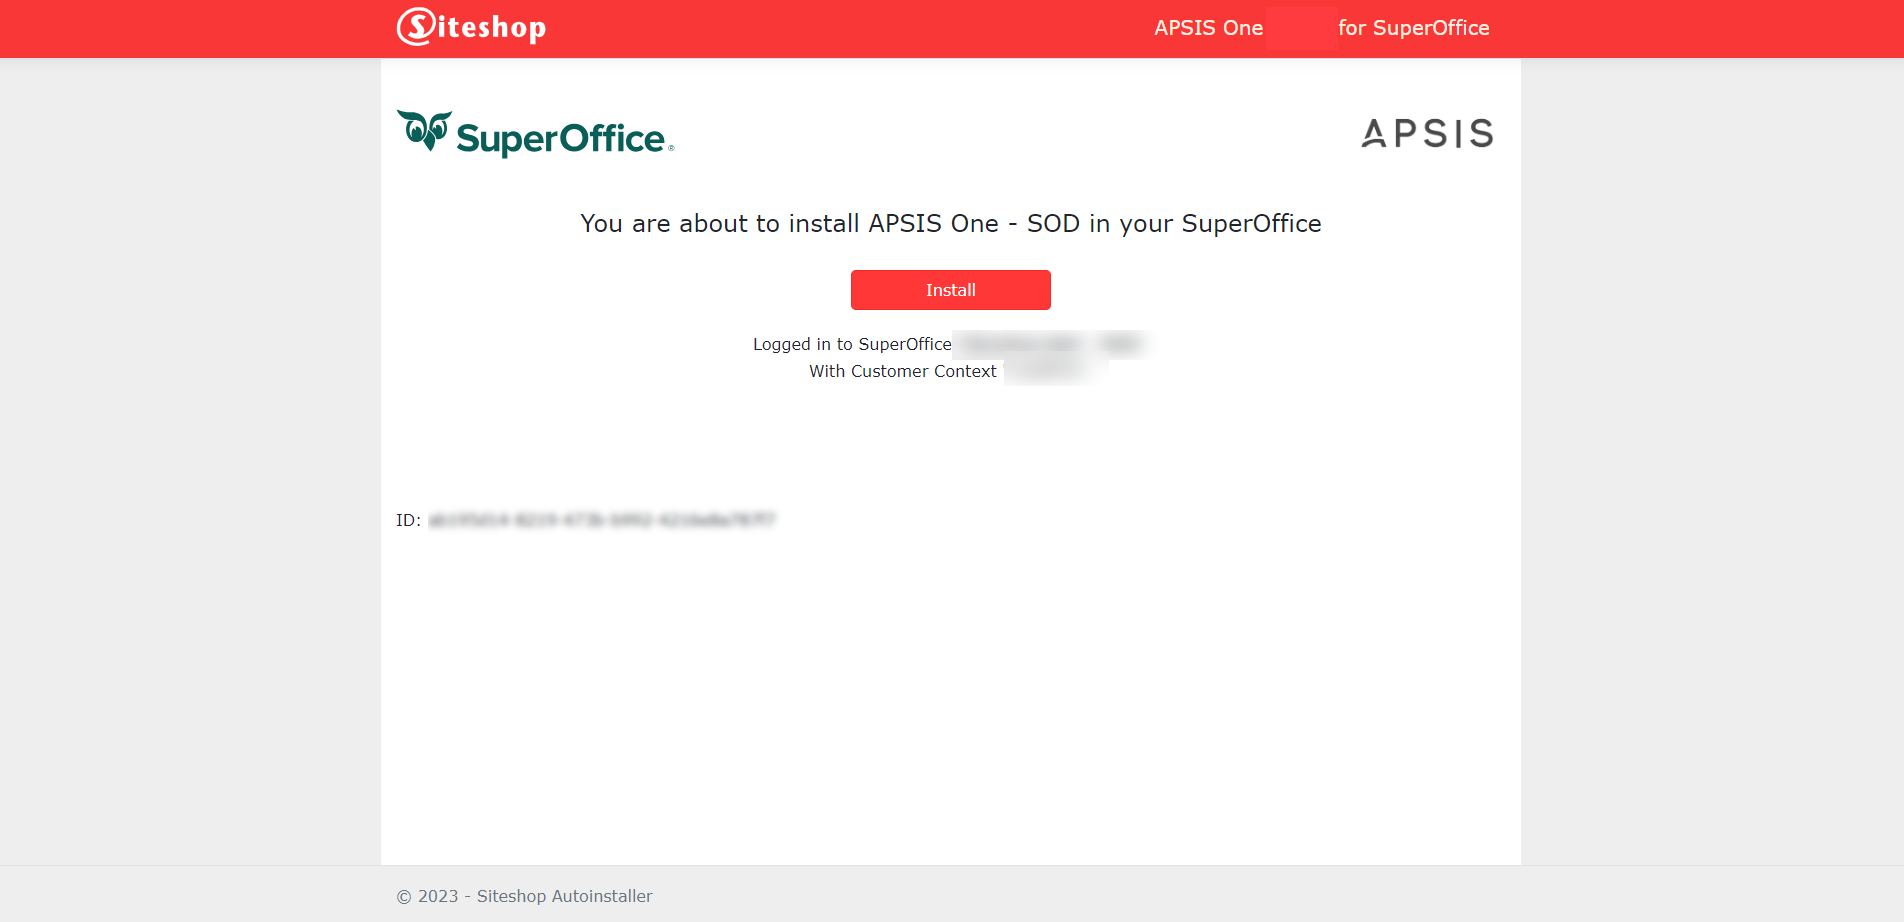
After you have signed up for the APSIS One connector (which you can do here: https://siteshop.dk/order-app/apsis-pro-for-superoffice/), you will be redirected to the installation page.
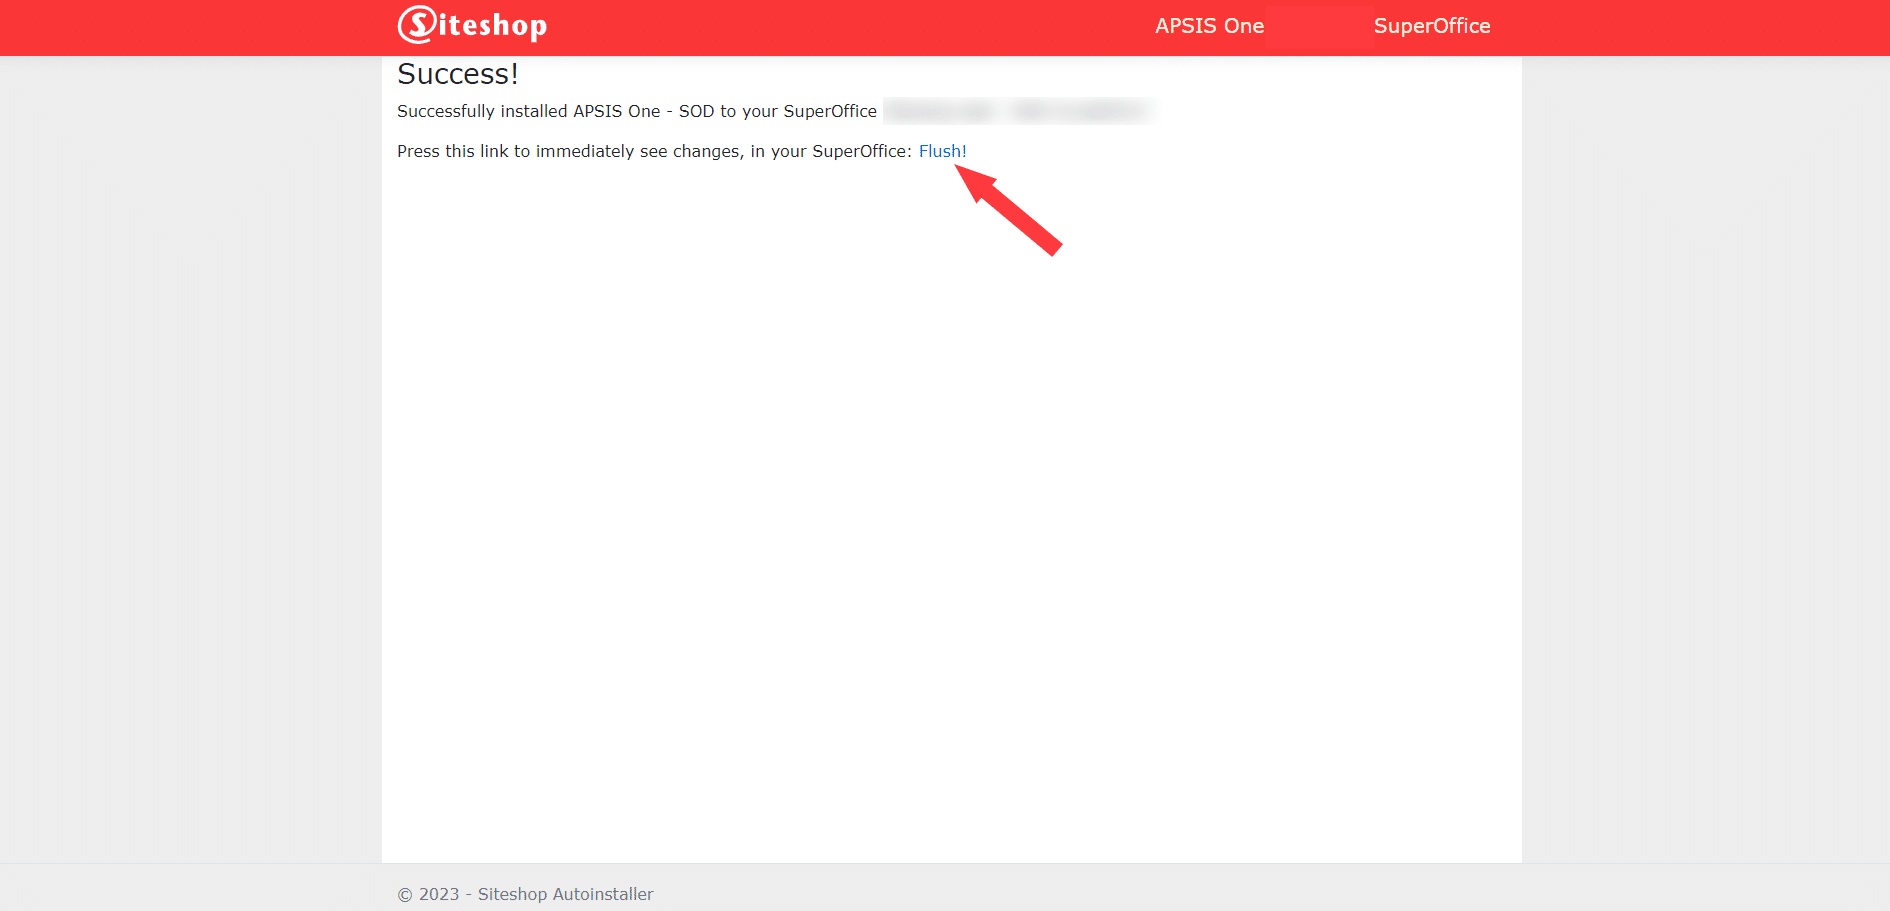
- Here you should click on “Install”, and then you will be redirected to a page with the message “Success!”.
- Click Flush! To empty the cache right away.
Step 2 – Assign the appropriate roles
To use Siteshop Apps in SuperOffice, users need to be assigned relevant roles. Here’s how you can do this.
Step 3 – APSIS One API Key
To complete the configuration and activate your APSIS One connector, follow these steps:
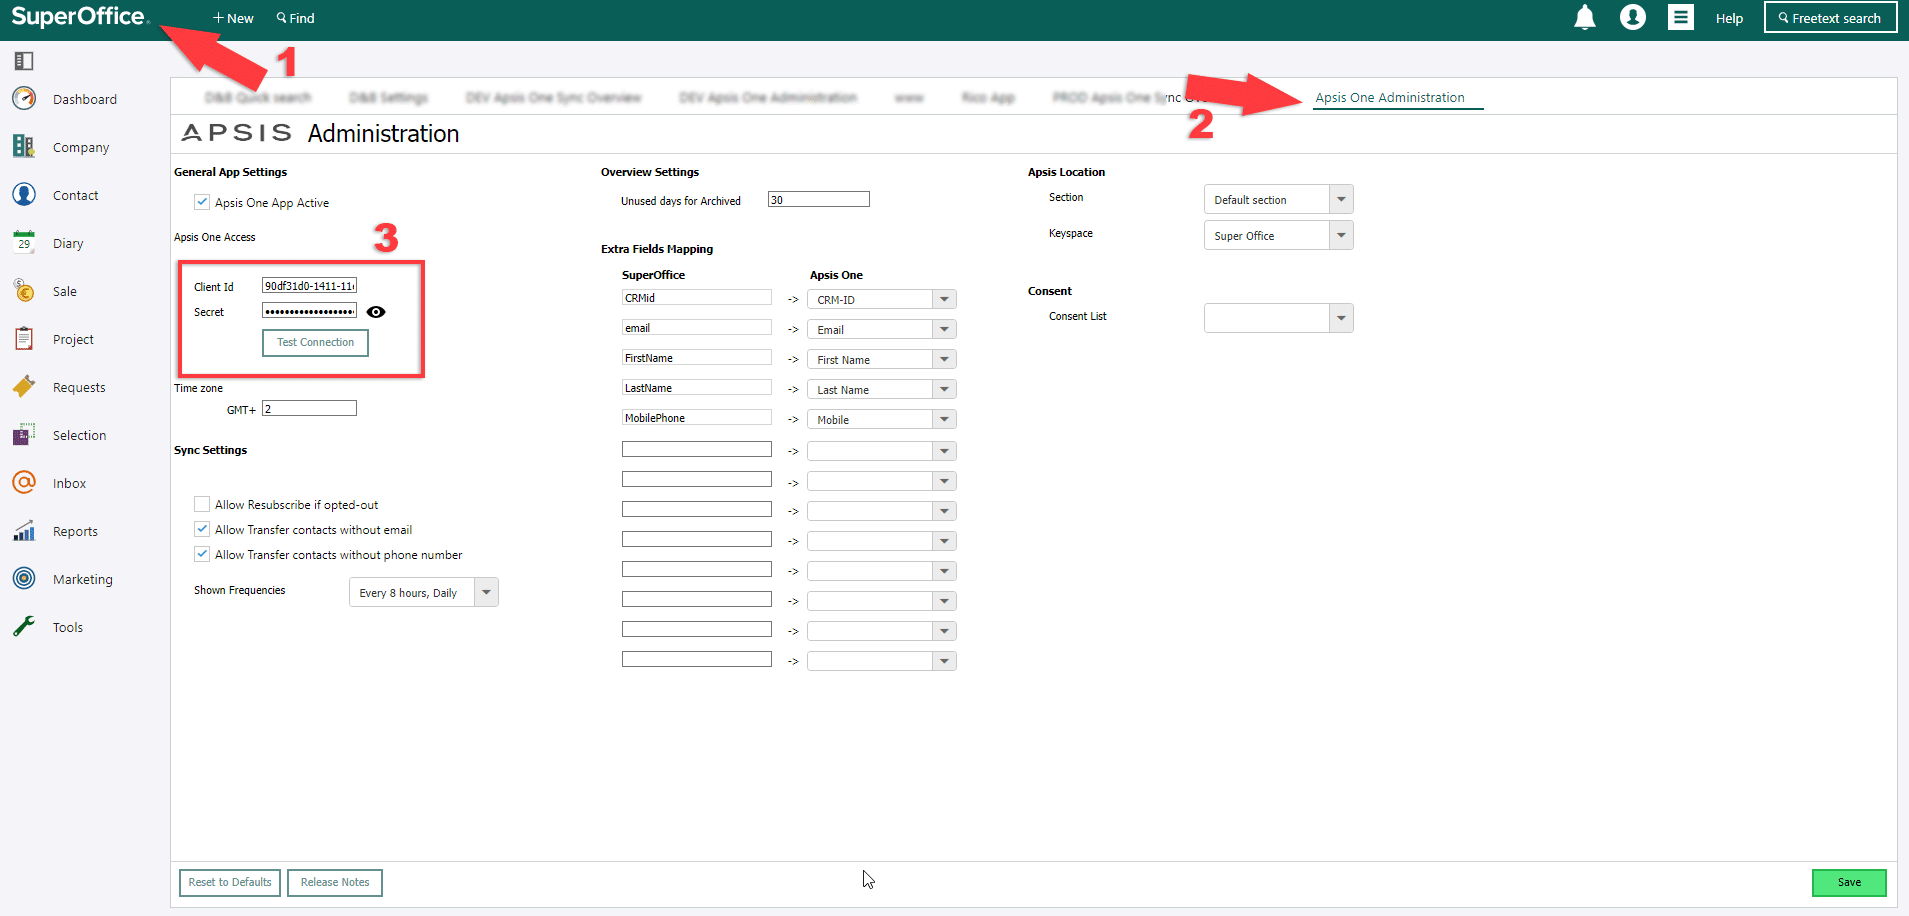
- Click the SuperOffice logo.
- Go to the APSIS One Administration web panel.
This step is only available for the “ApsisOne Administrators” user group (see step 2). - Insert the API information (Find the API information by following the instructions in step 4).
NB. Follow these steps if you are unable to see the web panels
Sometimes, the web panels may not appear immediately. Here’s how you can address this issue.
Step 4 – Find APSIS One API Key
This step is for those who didn’t already know where to find the API information.
Start by logging in to APSIS One on their website, thereafter, do the following.
- Go to integrations.
- Choose which section to integrate with SuperOffice.
- Find “SuperOffice CRM” and click on “Connect,” which will take you to the next page in APSIS One.

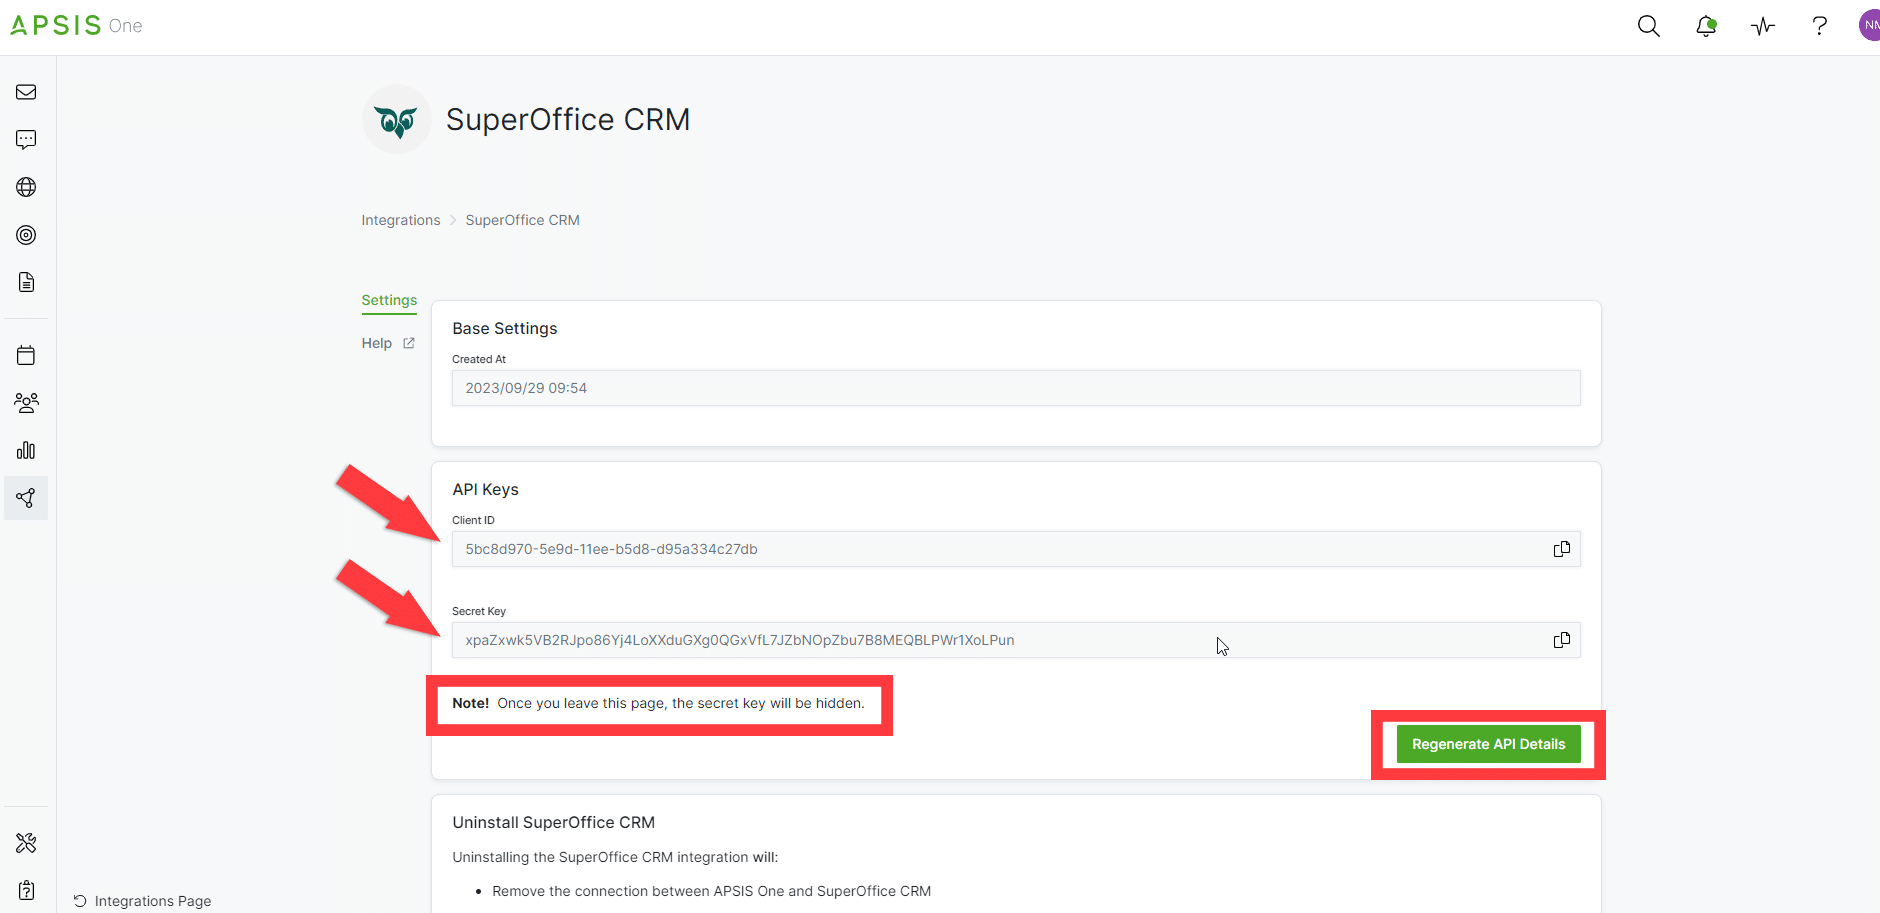
Here on the next page, you will find the API information indicated by the two arrows.
Please be aware that the secret key disappears after you leave this page. If you close the page without the key, press “Regenerate API Details” to generate a new key.